
So, you’ve built (or are planning) the ultimate garden room. Whether it’s a home office, a gym, a creative studio, or a weekend sanctuary, there’s one golden rule that will make or break your space: proper insulation.
Without it, your garden room will be a freezing icebox in January and an unbearable sauna in July.
Insulating your garden room isn’t just about comfort; it’s about protecting your investment from damp, reducing energy bills, and making the space usable 365 days a year.
In this guide, we’ll break down how to insulate the walls, roof, and floor, and compare the best insulation materials for the job.
Phase 1: The Floor (Stop the Rising Cold)
Ground chill is one of the biggest culprits behind a cold garden room. Because garden rooms are typically raised slightly off the ground on joists, cold air circulates underneath, sucking the warmth right out of your room.
How to do it:
- Lay a damp-proof membrane (DPM) over your subfloor to stop moisture rising.
- Install your timber floor joists.
- Cut insulation boards to fit snugly between the joists.
- Seal any gaps with expanding foam or foil tape.
- Lay your tongue-and-groove floorboards or plywood on top.
Materials Compared for Floors:
- PIR Boards (e.g., Celotex, Kingspan): The Gold Standard. Rigid foam boards offer the highest thermal performance for the thickness. Because floor height is often limited, PIR boards give you maximum warmth without raising the floor too high.
- Expanded Polystyrene (EPS): The Budget-Friendly Option. Lighter and cheaper than PIR boards, though slightly less thermally efficient. Still a great, moisture-resistant choice for floors.
- Mineral Wool: Not recommended. While cheap, it can sag over time and absorb moisture from below, leading to damp and rot.
Phase 2: The Walls (Locking the Heat In)
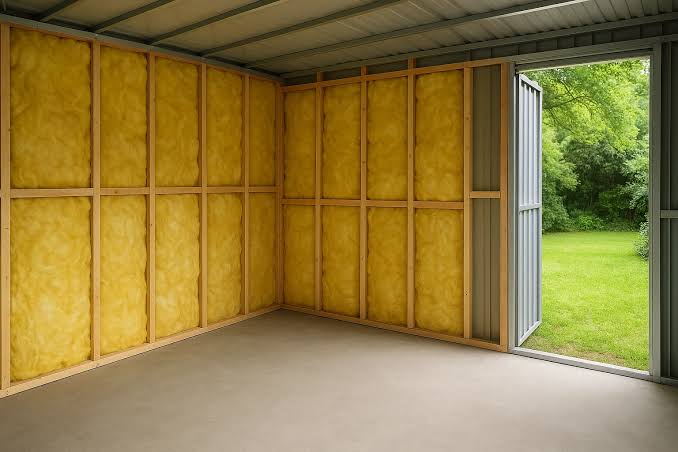
Wall insulation usually takes place within the timber stud frame of your garden room. The goal here is to create a continuous thermal envelope.
How to do it:
- Ensure your exterior cladding has a breathable waterproofing membrane (house wrap) behind it.
- Fit your chosen insulation snugly between the wooden studs of the wall frame.
- Install a vapor control layer (VCL) or polythene sheeting over the inside of the studs. This stops warm, moist air from your breath and activities from getting into the timber frame and causing condensation.
- Fix your interior finish (plasterboard, MDF, or tongue-and-groove cladding) over the top.
Materials Compared for Walls:
- PIR Rigid Boards: Excellent thermal efficiency, meaning thinner walls and more interior space. They are rigid and easy to cut to size between studs.
- Sheep’s Wool or Hemp (Eco-Friendly): Gaining massive popularity. These are breathable, sustainable materials that regulate moisture naturally. They are safer to handle than glass wool, though they are more expensive.
- Glass/Rock Mineral Wool Rolls: Easy to stuff between studs and cheap to buy. However, they can sag over time if not supported properly, and you must wear protective gear (masks and gloves) when installing them.
Phase 3: The Roof (Defending Against Heat Loss and Gain)
Heat rises, which means up to 40% of an uninsulated building’s heat can escape through the roof. Furthermore, in summer, a flat or pitched roof bears the brunt of direct sunlight. Roof insulation is non-negotiable.
How you insulate the roof depends on whether you have a warm roof or a cold roof design. (Note: Modern garden rooms almost always use a “warm roof” design, where the insulation is placed above the ceiling joists, directly beneath the roof covering).
How to do it (Warm Roof approach):
- Fit rigid insulation boards between or over the roof rafters.
- Add a high-performance vapour barrier underneath to prevent indoor condensation.
- Finish with your internal ceiling material (e.g., plasterboard or timber cladding).
Materials Compared for Roofs:
- PIR Rigid Boards: Undisputed winner here. Roofs require high thermal performance because of how much heat escapes upwards. PIR boards offer the highest R-value (thermal resistance) per inch.
- Spray Foam Insulation: A professional option where expanding foam is sprayed directly into the roof cavities. It seals every single nook and cranny, creating an airtight seal. It’s expensive, but incredibly effective.
- Multi-Foil Insulation: Thin, blanket-like layers of reflective foil and wadding. Great for tight roof spaces where traditional thick insulation won’t fit, as it reflects radiant heat back into the room.
Summary: Which Material Should You Choose?
To make your decision easier, here’s a quick cheat sheet:
| Material | Best Used For | Pros | Cons |
|---|---|---|---|
| PIR Boards (Celotex/Kingspan) | Floors, Walls, Roof | Highest thermal performance, thin profile, moisture resistant. | More expensive, requires precise cutting. |
| Mineral Wool (Rockwool/Knauf) | Walls | Cheap, fire-resistant, good acoustic insulation. | Bulky, sags over time, irritates skin during install. |
| Sheep’s Wool / Eco-Insulation | Walls, Roof | Sustainable, eco-friendly, regulates indoor humidity. | High price tag, can attract pests if untreated. |
| Multi-Foil Insulation | Roofs (tight spaces) | Very thin, reflects radiant heat, easy to staple in place. | Must be installed with exact air gaps to work properly. |
Don’t Forget Thermal Bridging!
Even with the best insulation, wood can conduct cold (known as a thermal bridge). Consider adding a thin layer of continuous insulation (like a 25mm PIR board) across the face of your studs before putting up your interior walls.
Take your time, seal every gap, and invest in quality materials—your future self (sipping coffee in a cozy winter garden office) will thank you!