
So, you’ve finally ordered your dream garden building—whether it’s a tranquil home office, a creative art studio, a ultimate man cave, or a sturdy shed for your gardening gear.
The countdown to delivery has begun, and excitement is building. But before you start planning the interior paint colors and furniture layout, there’s one crucial step that will make or break your entire project: the base.
Many people make the mistake of thinking a garden building can just be plonked onto flat grass or existing dirt. Unfortunately, without a solid, level foundation, your beautiful new building will soon suffer from sagging doors, warped windows, damp issues, and even structural failure.
Don’t worry—you don’t need a degree in civil engineering to get it right. Here is your ultimate step-by-step guide to preparing the ground properly for your new garden building.
Step 1: Choose the Right Spot
Location is everything. Before you dig a single spadeful of earth, consider the following:
- Sunlight and Shade: Do you want morning sun on your office, or are you trying to keep it cool in the summer?
- Access: Leave enough space around the perimeter of the building for future maintenance, painting, and gutter cleaning. Check with local planning guidelines regarding boundary distances, too.
- Drainage: Avoid low-lying areas where water naturally pools when it rains.
- Utilities: Are you planning to run electricity, Wi-Fi, or water to the building? Choose a spot that makes cable and pipe runs as easy as possible.
Step 2: Clear the Site
Once you’ve picked your spot, it’s time to clear the canvas.
- Remove all turf, topsoil, weeds, rocks, and debris from the footprint of the building.
- Dig down about 4 to 6 inches (100–150mm) to remove the organic topsoil. You want to reach the sub-base (firm, compacted earth), as topsoil is unstable and prone to shifting.
- Pro Tip: Lay down a heavy-duty weed membrane across the cleared area. This prevents stubborn weeds and grass from growing up through your base and into your building later on.
Step 3: Choose Your Base Type
There are three main types of bases used for garden buildings. Your choice will depend on your budget, DIY skill level, and the weight of your building:
1. Concrete Slab (The Gold Standard)
- Best for: Heavy buildings, log cabins, workshops, and maximum longevity.
- Pros: Incredibly strong, permanent, and completely flat.
- Cons: Takes physical labor, requires mixing concrete, and takes time to cure.
2. Plastic Grid System (The Modern DIY Favorite)
- Best for: Most standard sheds, summerhouses, and garden offices.
- Pros: Lightweight, highly porous (great for drainage), incredibly quick to install, and made from recycled materials.
- Cons: Needs a properly compacted hardcore sub-base first.
3. Timber Frame/Post Base (The Sloping Site Solution)
- Best for: Sloping gardens or uneven terrain.
- Pros: Keeps the building elevated off wet ground without needing massive amounts of concrete.
- Cons: Requires precise carpentry skills to ensure it’s structurally sound.
Note: For the sake of this guide, we’ll focus on preparing the ground for a Concrete Slab or a Hardcore + Plastic Grid system, as these are the most common.
Step 4: Build the Edging and Add Hardcore
To keep your sub-base contained, you need a perimeter.
- Use treated timber boards (or brick/blocks) staked securely into the ground to create a frame that matches the exact dimensions of your building base.
- Fill the excavated area with a layer of MOT Type 1 hardcore (crushed stone and dust). Fill to a depth of about 3 to 4 inches.
- Compact it down! This is the step most DIYers skip, and it’s where mistakes happen. Hire a mechanical plate compactor (wacker plate) from your local tool hire shop and go over the hardcore multiple times until it is rock solid.
Step 5: Pour Concrete or Lay Grids
Depending on the base type you chose:
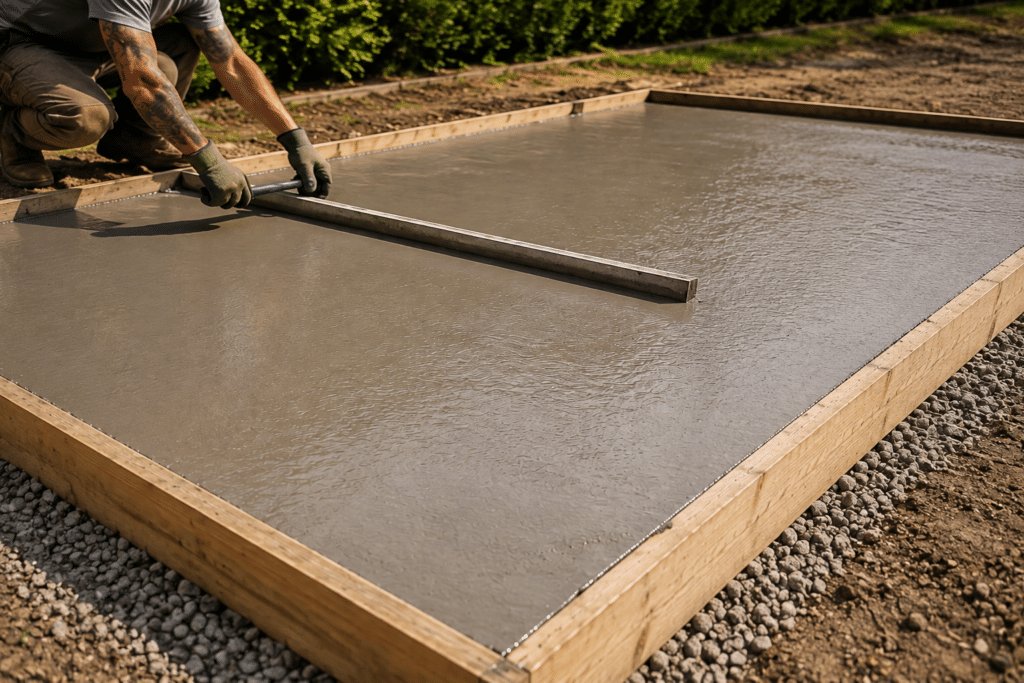
- If doing Concrete: Build a sturdy wooden shuttering frame, lay a damp-proof membrane (DPM) to stop rising moisture, add reinforcing mesh for extra strength, and pour your concrete mix. Screed it level using a straight piece of timber, and let it cure fully (usually at least 48–72 hours before building on it).
- If using Plastic Grids: On top of your compacted hardcore, add a thin layer of sharp sand or blinding to get it perfectly smooth. Lay your interlocking plastic grids, fill them with pea gravel or small stones, and you’re ready to go—no curing time required!
Step 6: The Final Check
Before the delivery crew arrives or you unpack your flat-pack building, grab a long spirit level.
- Check the base in multiple directions (horizontally, vertically, and diagonally).
- Even a tiny slope can cause doors to hang crookedly and windows to jam. Fixing a base now takes minutes; fixing a built structure takes hours of frustration.
Preparing the ground properly isn’t the most glamorous part of getting a garden building, but it is undoubtedly the most important. Think of your base as the foundation of your home—get it right, and your garden building will stand strong, dry, and level for decades to come.