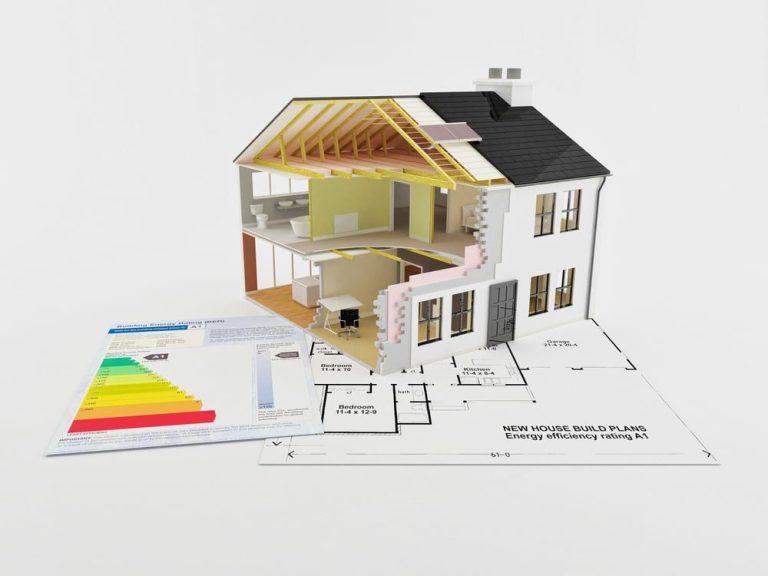
Renovating? Turn the chaos of construction into an opportunity to future‑proof your home with a truly “smart” wiring backbone.
Why Hard‑Wiring Beats Plug‑and‑Play
| Plug‑and‑Play (wireless‑first) | Hard‑Wired Backbone |
|---|---|
| Easy to start – just snap a hub into a power outlet. | Higher upfront cost – requires electrician time and materials. |
| Limited range – Wi‑Fi dead zones, interference from neighbors, and crowded 2.4 GHz bands. | Rock‑solid reliability – Ethernet, powerline, and fiber run directly to each device. |
| Latency spikes – video streams, voice assistants, and security cameras can stutter. | Low latency – near‑instant response for lighting, HVAC, and security systems. |
| Security gaps – each new device is a new attack surface. | Built‑in security – VLANs, firewalls, and isolated control networks keep the smart layer separate from the family Wi‑Fi. |
| Future upgrades – often require new hubs or repeaters. | Future‑proof – Add new devices, upgrade to Wi‑Fi 6/7, or switch to Matter without rewiring. |
If you’re already tearing down walls, pulling down old drywall, and rerouting plumbing, the cost of adding conduit, Ethernet drops, and a dedicated smart‑home panel is a fraction of the price of retrofitting later – both in money and in headaches.
Step‑by‑Step: Building a Hard‑Wired Smart Home Skeleton
Pro tip: Even if you’re not a certified electrician, you can do a lot of the planning and low‑voltage work yourself. Anything that touches mains power should be left to a licensed pro.
1. Map Your “Smart Zones”
| Zone | Typical Devices | Wiring Needs |
|---|---|---|
| Living Room | Smart TV, sound system, lighting, blinds | 1‑Gig Ethernet (Cat‑6a/7) to a switch, optional HDMI‑over‑Ethernet |
| Kitchen | Smart fridge, oven, coffee maker, leak sensors | Cat‑6 for appliances, dedicated 240 V circuit for high‑draw devices |
| Master Suite | Climate control, bedside lighting, door lock, security cam | Cat‑6 to a wall‑plate, PoE+ for cameras |
| Garage / Workshop | EV charger, security system, lighting | 240 V for charger, Cat‑6 for cameras & sensors |
| Whole‑House | Central hub, routers, home theatre rack, UPS | 2‑wire conduit to a central Smart Home Distribution Panel (SHDP) |
Sketch a simple floor plan (even on a napkin) and draw lines where each Ethernet drop, fiber run, and power line will travel. This helps the electrician see where conduit is needed before any drywall goes up.
2. Choose the Right Cabling Standard
| Standard | Speed | Shielding | Typical Use |
|---|---|---|---|
| Cat‑5e | 1 Gbps (up to 100 m) | UTP | Legacy devices, low‑budget projects |
| Cat‑6 | 10 Gbps (55 m) | UTP/STP | Most residential smart devices |
| Cat‑6a | 10 Gbps (100 m) | STP | Future‑proofing, 4K streaming, home office |
| Cat‑7 / Cat‑8 | 25‑40 Gbps (up to 30 m) | S/FTP | Ultra‑high‑performance labs, data‑center‑grade homes |
| Fiber (single‑mode) | 10 Gbps‑100 Gbps+ | N/A | Backbone between floors / out‑door link to ISP |
Rule of thumb: Run Cat‑6a everywhere and fiber only where you need long runs (e.g., between basement and attic) or want future gigabit‑plus speeds for a home office or media server.
3. Install Conduit Early
- PVC or EMT (electrical metallic tubing) is cheap and protects cables for the life of the home.
- Run separate conduit for low‑voltage (Ethernet, coax, speaker wire) and high‑voltage (120/240 V, EV charger). This avoids interference and complies with most building codes.
- Label every conduit with a simple code (e.g., “L‑R‑01” = Living‑Room‑01 Ethernet). Later you’ll thank yourself when you’re pulling new wires.
4. Build a Central Smart‑Home Distribution Panel (SHDP)
Think of the SHDP as a mini data center for your house:
| Panel Component | Why It Matters |
|---|---|
| Managed PoE Switch (8‑24 ports) | Powers IP cameras, door locks, and voice assistants without extra adapters. |
| Unmanaged Gigabit Switch | For devices that don’t need PoE (media players, routers). |
| Patch Panel (Cat‑6a) | Neat, labeled terminations make future moves painless. |
| UPS (Uninterruptible Power Supply) | Keeps the hub, routers, and security system alive during a blackout. |
| Firewall / Router | Separate VLANs for IoT vs. family devices (enhances security). |
| Smart Home Hub (Matter‑compatible) | Centralizes control for lights, shades, HVAC, and more. |
| Cable Management (Velcro ties, rack shelves) | Keeps everything tidy and cool. |
Mount the SHDP in an accessible closet, utility room, or the garage near your main electrical panel. Keep it under 80 % of its rated load to allow for future expansion.
5. Wire Each Room
- Run the Ethernet cable from the SHDP out through the conduit to each planned outlet location.
- Terminate each cable in a keystone jack (Cat‑6a-rated) set into a drywall box.
- Add power:
- For standard 120 V outlets, follow local code for GFCI protection in kitchens and bathrooms.
- For dedicated 240 V circuits (EV charger, high‑draw appliances), run separate THHN wire in conduit.
- Install PoE injector (or use a PoE‑enabled switch) for devices that need it—e.g., ceiling lights, smart dimmers, or security cameras.
6. Connect the Devices
| Device | Typical Wiring | Example Setup |
|---|---|---|
| Smart Light Switch | 120 V line + neutral + Ethernet (optional) | Connect to existing lighting circuit; plug Ethernet into wall jack, then into PoE switch. |
| IP Security Camera | PoE (48 V) + Ethernet | Plug into PoE jack, mount on wall/ceiling, configure via hub. |
| Thermostat (Nest, Ecobee, etc.) | 24 V HVAC wires + Ethernet (optional) | Connect to HVAC “C” wire for power; Ethernet runs to hub for faster updates. |
| Smart Blind Controller | 120 V + Ethernet | Wire into blind motor power, Ethernet to PoE port for control. |
| Home Theater Receiver | HDMI‑over‑Ethernet (HDBaseT) + Power | Run Cat‑6a to receiver; use HDMI‑over‑Cat converters for 4K 120 Hz video. |
7. Program, Test, and Document
- Initial Test: Verify each Ethernet drop lights up on the switch’s link LEDs. Use a cable tester for continuity and length checks.
- Network Segmentation: Create a VLAN for IoT (e.g., VLAN 20) separate from your personal devices (VLAN 10). This limits any compromised smart device from seeing your laptops or phones.
- Automation Platform: Choose a Matter‑compatible hub (Apple HomeKit, Google Home, Amazon Alexa, or a neutral hub like Home Assistant). Import the wired devices—most PoE cameras and switches present themselves automatically.
- Documentation: Create a digital map (Google Sheets, Notion, or a home‑automation app) listing:
- Room & outlet label
- Cable type & length
- Switch port number
- Device model & firmware version
- Date of installation
Having this “as‑built” sheet saves time when you replace a camera or upgrade a switch.
Common Pitfalls & How to Dodge Them
| Pitfall | Consequence | Fix / Prevention |
|---|---|---|
| Running Ethernet alongside high‑voltage power without proper separation | EMI causing intermittent drops, code violations | Keep at least 12 in (30 cm) separation or use shielded conduit. |
| Forgetting a “C” (common) wire for thermostats | Thermostat won’t power without batteries | Run a dedicated 24 V AC transformer or use a smart thermostat that can draw power from PoE. |
| Oversizing PoE budget | Switch ports under‑powered, devices reboot | Check each device’s PoE class; choose a 60‑W or 90‑W PoE+ switch accordingly. |
| Skipping a UPS for the SHDP | Hub/repeater dies during outage → security gap | Install a UPS rated for at least 30 min runtime on critical components. |
| Hard‑wiring only the first floor | Later runs become expensive & messy | Run vertical conduit shafts early; pull extra slack cable now for future floors. |
| Using cheap, unshielded keystone jacks | Data errors, especially with PoE cameras | Invest in Cat‑6a rated, shielded jacks; terminate with a proper crimp tool. |
Cost Snapshot (2026 U.S. average)
| Item | Approx. Cost (per unit) | Typical Quantity for a 2,500 sq ft home | Total |
|---|---|---|---|
| Cat‑6a bulk cable (250 ft roll) | $80 | 8 rolls (≈2,000 ft) | $640 |
| PVC conduit (½‑in, 100 ft) | $30 | 15 runs | $450 |
| Managed PoE Switch (24‑port, 90 W) | $250 | 1 | $250 |
| Unmanaged Gigabit Switch (8‑port) | $40 | 1 | $40 |
| Patch Panel (24‑port, Cat‑6a) | $120 | 1 | $120 |
| UPS (1500 VA) | $200 | 1 | $200 |
| Keystone Jacks (pack of 10) | $20 | 30 packs | $600 |
| Labor – Licensed Electrician | $85/hr | 80 hrs (average) | $6,800 |
| Misc. (labels, cable ties, rack hardware) | $150 | – | $150 |
| **Grand Total | – | – | ≈$9,250 |
Remember: The long‑term ROI comes from lower energy bills (smart thermostats, automated lighting), reduced maintenance (wired devices rarely need battery changes), and increased home resale value—buyers love a “plug‑and‑play” smart system that’s already wired.
Future‑Proofing Tips
- Leave Extra Slack in every conduit. You’ll thank yourself when a new 10‑Gbps camera arrives.
- Run a single fiber strand between the SHDP and a remote media rack (e.g., in a finished basement). That gives you 10‑Gbps+ backhaul for streaming, gaming, or a home‑office “data center.”
- Plan for Matter – The new universal smart‑home protocol runs over Thread (802.15.4) and Wi‑Fi, but a wired Thread border router can be added later for ultra‑low‑latency control.
- Add a “Smart‑Home Spare” circuit (20 A, 240 V) at the main panel. Use it for future EV chargers, heat‑pump upgrades, or an outdoor 5G/6G antenna.
- Monitor Power Consumption – Install a whole‑home energy monitor (e.g., Sense) on the main panel. It’s a low‑cost way to see how your automation is actually saving energy.
A Quick Real‑World Example
The Martinez Family Renovation (Portland, OR – 2025)
Goal: Convert a 1970s ranch house into a minimalist smart home while keeping the budget under $12k.
- Step 1: The architect added two 1‑inch PVC chase walls that run from the basement to the attic.
- Step 2: An electrician installed Cat‑6a in all chase walls, pulling 24 drops (living, kitchen, master, guest suite, office, garage).
- Step 3: They placed a 24‑port PoE+ switch plus a 10‑Gbps fiber line to a small media rack in the basement.
- Step 4: All smart lights, blinds, and cameras were wired for PoE; the thermostat used a 24 V transformer that also ran through the same conduit.
- Result: After moving in, the Martinezes reported 30 % lower electricity usage thanks to precise HVAC scheduling, no Wi‑Fi dead zones, and a “set‑and‑forget” control panel on their wall tablets. Their realtor noted the hard‑wired smart system as a selling point during the next listing.
TL;DR – Your 5‑Minute Checklist
| ✅ | Action |
|---|---|
| 1 | Sketch zones and decide where Ethernet, PoE, and high‑voltage will go. |
| 2 | Choose Cat‑6a (or higher) and run conduit before drywall. |
| 3 | Build a Smart‑Home Distribution Panel with PoE switch, UPS, and firewall. |
| 4 | Wire each room with keystone jacks, PoE, and dedicated circuits for heavy loads. |
| 5 | Segment your network (IoT VLAN), install a Matter hub, and document everything. |
| 6 | Test every drop, label the panels, and enjoy the peace of mind that your home is wired for the future. |
Ready to Get Started?
If you’re in the middle of a renovation, now is the perfect moment to turn chaos into connectivity. Hard‑wiring may feel like a “big‑ticket” item, but it’s the backbone that lets every smart bulb, lock, and speaker work flawlessly—and it adds serious resale value.
Got questions about conduit routing, PoE budgeting, or which Matter hub to pick? Drop a comment below or reach out directly – I’m happy to help you design the perfect smart‑home skeleton for your next renovation!